We were given rough footage from the television show Blue Murder which is a police drama. Our task was to take the footage which is over fifteen minutes of footage and edit it down to a one minute clip. My group decided to present the one minute clip as “previously on Blue Murder…”. We decided it would be best to keep the context of the television the show and use this one minute clip to update the audience of what happened previously on the show in order to refresh the audience memory of last week’s episode before watching the brand new episode. All the clips we chose were high intensity showing the most crucial parts of the show. We were not allowed to use synched audio from the show, so my group wrote voice narrative script, and then recorded it to fill in the gaps of where we were missing information. We decided to get rid of the visual time code at the bottom of the screen to make the scene seem more real.
One thing we had to fix in the video was Constable Chazz was shooting in one direction and the bad guys were shooting in a different direction than the police officer. We did not want to cross the 180 rule because it did not make sense. We decided that we would flip the scene where the cop was shooting in order to keep continuity between the scenes. In Final Cut we “flopped” the whole images it made more sense since the shooters and the cop now looked like they were shooting at each other. One last thing we had to consider since we flopped the scene was that the licence plate on the van was now backwards. We decided to fix this and blur out the licence plate, just like they do in some cop television shows or on the news.
Our one minute clip had to include two or more criteria given to us. Our group chose to express/ tells a story and hints of an autobiography. The one minute clip focuses on a day in the life of Constable Chazz as a police officer. We see him walking around downtown Toronto, when he hears gun firing and he runs to the scene of the crime. The video tells a story of Chazz as a police officer saving people’s lives and preventing/ stopping crime. The clip also hints at an autobiography since it shows him doing his daily tasks at work and how he responds in this high intensity situation. A person's job can show you a lot about a person’s character and this helps to show Constable Chazz in an autobiographical state.
Finally, we were told to address one item from Robert Bresson’s notes on sound. Our group decided to address was “image and sound must not support each other, but must work each in turn through a sort of relay”. This one seemed the more reasonable to consider since we were not allowed to use synched audio. This made us really consider and have to find appropriate sound and to link it with what images. Or in some cases, the visual images were more important and could stand alone without having some kind of soundtrack added to better a scene or to emphasis it. The video and sound were not used to support each other but worked together in order to make the best piece of work.
Blue Murder from Leah Fendley on Vimeo.
Monday, January 26, 2009
Tuesday, January 20, 2009
Journal 2- Tran Scan
This week in class we were shown a film called Tran Scan, which was a video that was composed of all still-frame time lapse pictures taken in the perspective of the traveler. This film composed completely of pictures created a very real representation as if you were the one driving across the country in a car. I often get motion sickness from driving in the car, and this actually simulated that for me as well. As soon as the film started I knew my head was not going to be able handle the ups and downs that the camera simulated while driving. I had to look away every so often so I wouldn’t get sick, but I still walked away after with my head having a headache.
This video meant a lot of me because when I first learned about stop motion, I have always wanted to create a stop motion piece of my own. My goal is to one day actually maybe create one, or maybe I will make a stop motion project for an assignment this semester. This whole idea of using still frame images to create a movie just seemed very interesting to me, leaving me with wanting to create a work of my own. This has been a very inspirational piece for me, and I will use it as inspiration throughout this semester, perhaps this will give me an idea somewhere down the road in my future. As soon as I saw this film, I just wanted to know how he did it. So below I have posted how he constructed Tran Scan.
How the film was created: Shot with a Minolta Dimage 7i at 2560 x 1920 pixels.
Each shot covers about 10 kilometers (6 miles).
Time-lapse speed is about 5,700 km/h (3,550 mph).
Interval between snapshots is about 5 seconds.
Playback rate is 10 snapshots per second.
There are 5,000 snapshots.
Driving distance was 7,200 km (4,480 miles).
The drive took 14 days (no retakes).
Total creation time was 4,450 person-hours.
List was copied from: http://www.transcanfilm.com/makingof.html
Journal 1- Intro to Cameras
This week in class we were split into groups and each group was given a video camera. One group was using Sony DSR-PDX10 video camera, another group Sony PD170, and lastly my group was using a Sony HD HDR HC7 camera. These were different video cameras then what we were used to using last year. We were taught all the basic functions of the camera, how to turn it on, where the battery went, how to charge the batteries, how to zoom, how to set the camera to manual settings etc. I was really jealous when I saw some of the other groups using the Sony PDX10’s because this camera looked very professional to me and I really wanted to learn how to use it, but it made realize that it is there to use on future assignments.
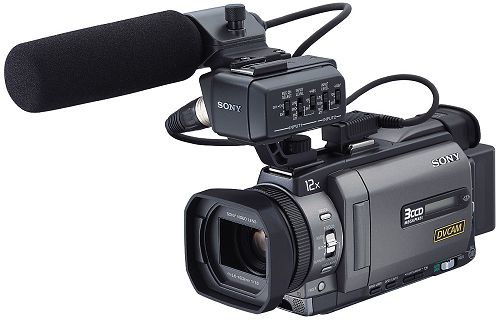
Sony DSR-PDX10
After we were done learning how to use our cameras we were given a function and we were sent out to take footage using our assigned function. My group was assigned to use digital effects while filming. This puzzled my group a lot at first because we thought that digital effects were only done during the editing phases. We got out the manual and looked up digital effects and surely enough we found that there were a bunch of different functions we could use. One digital effect we used was “old movie”; while we shot video the camera added the effect as if we were filming using an old video camera. Other effects that we fooled around with were sepia, still images, trail, mosaic and other cool effects. This experiment was interesting because it forced us to learn something new on the cameras and we also gave us a refresher on how to use the cameras. I really like hands on tasks, so this in class assignment was great for me because being able to hold the cameras helped me learn it a lot better than if the professor has just given a lecture on it.
Sony HD HDR HC7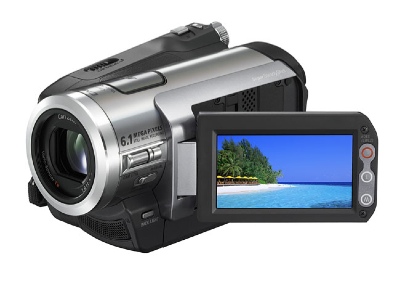
Sony DSR-PDX10
After we were done learning how to use our cameras we were given a function and we were sent out to take footage using our assigned function. My group was assigned to use digital effects while filming. This puzzled my group a lot at first because we thought that digital effects were only done during the editing phases. We got out the manual and looked up digital effects and surely enough we found that there were a bunch of different functions we could use. One digital effect we used was “old movie”; while we shot video the camera added the effect as if we were filming using an old video camera. Other effects that we fooled around with were sepia, still images, trail, mosaic and other cool effects. This experiment was interesting because it forced us to learn something new on the cameras and we also gave us a refresher on how to use the cameras. I really like hands on tasks, so this in class assignment was great for me because being able to hold the cameras helped me learn it a lot better than if the professor has just given a lecture on it.
Subscribe to:
Posts (Atom)