In the book, In the Blink of an Eye, the chapter Test Screenings: Referred Pain was very inspiration to our group. The chapter discusses how when you work to closely with your movies sometimes you become too invested, and it’s often helpful for you to get outside perspective for your final production. During each phase of the Body Break commercial we would often stop and ask a group of people for reassurance that we were not to invested and become blind as to what the audience would think was funny. For example, after we completed the script to Body Break we read the script to our friends to make sure what we envisioned as funny was also funny to our potential audience. So we tested out product on multiple levels, not only to the class during each submission process but we also showed our friends before hand as last minute advice givers. The audience since they had an impartial connection to the commercial would have no problem telling us things that they thought worked for us, and gave us pointers or ideas of what we could also to enhance the overall commercial. A lot of the times when you do “test” previews to an audience, they can find things that you can no longer see since you have just been watching it over and over again and can’t see those particular things anymore. It is interesting as to what the audience will pick out, that you perhaps never saw before that becomes helpful for you later.
Also in the chapter, Seeing Around the Edge of the Frame, Walter Murch discusses how “the film editor is one of the few people working on the production of the film who does not know the exact conditions under which it was shot, and who can at the same time have a tremendous influence on the film”(Murch 23). This statement was very true for our group on Body Break. Karen and I were our “set” while we filmed and we knew exactly everything that went on, and different changes to the script that we made just on location that we thought would be better. However, Laura was not on set with us and at the beginning she was our “editor” who did not know all these on set conditions, however, at the same time she had tremendous influence on the film. She was able to see past different things that Karen and I kept seeing while watching the different takes and she was able to pick out which clip was the best one. She was also able to make connections of rough footage that Karen and I did not see before because we were still envisioning it how we had filmed it and had this personal link to the footage. Where as Laura had this outside perspective that was tremendous to us in the editing process that was helpful.
Overall, this book gave us a lot of guidance and ideas to think about throughout the production process of Body Break, which was very helpful along long the process. The book was also very interesting and very relatable to read, it often said things that we were not even thinking about that was useful for us to read about.
Today in class, a PowerPoint was given on typography and instantly I recognised one of the first photographs by David Carson. Last year in history of graphic design course, we had to pick a graphic artist and for our final assignment we had to mimic their work. I was instantly attracted to Carson’s work because it was very unusual and I couldn’t get past the fact that a lot of his work was illegible. I loved how he rejects the traditional rules of design when dealing with page layouts, use of text and images. To me this concept was foreign to me because all the way through school we were always taught the importance of legibility. After researching Carson’s work I learned that it doesn’t always matter if text is legible. David’s titles are often spread across a whole page, or erratically across images, or in expressive sequences. Carson emerged into the graphic design industry by having his text in irregular shapes, making it hard for viewers to decipher his work by slicing away parts of the letters. David loves to play with text columns to make them the width of the page and eliminate gutters between columns.
I found his work to be very inspiration and very fun to mimic because I was allowed to break away from traditional rules that we were taught in school. I made a series of posters representing his work. I noticed that most of the time Carson’s work has connections between the title and the image. I got the inspiration to make the “criminal, like the artist, is a social explorer” poster by relating the text and the image. I came across one of his previous works titled “Hanging on Carmine Street”, where the text was “hung” on the page and is both upsides down and spaced out. I decided to follow this format, so I picked a quote of his and then I decided to make the text look as if it had been painted through with white paint. The text is shown to have a degree of illegibility from the strokes through the words.
Another thing I learned and applied to my work was inspired by a two different pieces of his work. I came across where on the left page was a quote by C.G Jung. The first and last letter of each word is not capitalized but the size o the text had been increased. I took this method of his and used another quote by David and mimicked his technique. On the right page, there was an image representing the quote he had used. I made an image that corresponded with Carson’s quote by imitating another poster by him, which was very similar to the one you had in the PowerPoint with all the words layered on top of each other. The poster shows a bunch of words repeated continuously in a given area until it became illegible and clustered. Then on top of the clutter of text with white text Carson brilliantly wrote the quote on top. I imitated this concept by repeating the word “commercial” until almost becoming illegible, layering on top of a toilet. Then on top of the clutter of text I added the word “commercials” in white text to make the concept clearer.
Click for larger file of this one...
I know his concept of legibility doesn’t necessarily fit into all projects, but whenever I get a chance I use Carson’s work for inspiration because I really like the idea of not always following rules. With not having rules to follow, I often find I can produce a better piece of art because I am not confined to different guidelines and rules and having to opportunity to just go with it.
When I was in grade four, my aunt and four cousins had moved into our house for a year and this particular year for Christmas my parents had gotten me a black and white Toys ‘R’ Us video camera. I spent all Christmas day playing around with it, and I eventually had come to the conclusion that I was going to invite each family member into my bedroom, one by one, and film them having an interview with me. For the last eleven years, each Christmas a video has been created and aired for the whole family right after Christmas dinner.
In my family, the Christmas video helps to unite and bring us together and has becomes a part of Christmas that we all look forward to each year. The video is broken down into two or sometime three segments. The first part is some kind of Christmas re-enactment of a popular culture reference. For example, one year we acted out “Twas the Night before Christmas”. Another year I compiled eight years of film and created a “Best of the Years” segment, where it began with a slide show of pictures of us revolving around Christmas throughout the years. After the slide show, I compiled funny answers to questions, or simply just contrasting how we started off with a black and white camera to a state of art camera. The second segment of the Christmas video is an interview portion, where questions are asked reflecting the past year, and what they wanted for Christmas this year. The last portion of the video is somewhat a new tradition over the past few years, where everyone is given a line from a song and I splice it all together to make our own version of the song. For example, last year we sang We Wish You a Merry Christmas, and another year we sang The 12 Day’s of Christmas.
One year my cousin Ryan was living in Whistler and did not come home for Christmas that year. We all decided that we would help bring Christmas to him, so we filmed the Christmas video two weeks early just so we could mail it to him to watch on Christmas. This year’s theme was we all had to dress up and pretend to be someone else in the family, and then our typical interview process. Even though Ryan was not with us that Christmas, the video made him feel as if he was and he did not get to miss out on everyone’s favourite part of Christmas.
Every year, the Christmas video has only improved from the years before, and each year everyone is trying to out do their last year’s performance. Throughout the years our technology has moved from the simple black and white Toys ‘R’ Us video camera, to an updated Toys ‘R’ Us colour camera, then this huge video camera my dad owned that I had to have attached to a VCR at all times in order to record. Then finally when I was in high school I bought myself a video camera that had the capabilities to attach to a computer and I could edit the Christmas video. This is when our Christmas videos were finally taken to the next level and anything became possible to recreate and have this professional finished look. After the video has been filmed, and Christmas dinner has been eaten; all seventeen of us pile into the family room to spend the next forty-five minutes sharing this time together as a family. This has become a yearly tradition like I said for the last eleven years and for my family, we look forward to the Christmas video over what Christmas presents we will be receiving that year. All it took was receiving a black and white video camera for Christmas one year to inspire my interest in filming and editing. This is one tradition that I don’t ever see disappearing within my family.
On Tuesday, March 17th 2009 our class went to Toronto to visit Deluxe, the video and audio production house. I was surprised to find out that they have produced a lot of big budget movies and television shows such as: The Saw series, and Pan’s Labyrinth. Our class was taken on a tour of the building and our tour began in the board room where they just explained everything to us before taking us on the tour.
The room I found the most interesting on the tour was the Foley room. I never really knew this was a job or this is how they conducted this part of the audio soundtrack. I truthfully did not know that production studio’s had a whole room assigned just for doing these everyday sounds that were not useable from shooting. To many this room would of looked very junky but to a Foley artist they probably know where everything is within the clutter and know how to make sound effects with even the weirdest techniques to produce a sound of something they cannot record within this particular room.
One thing I found very interesting was when the guys were explaining how good Foley artists when recording walking sound effects often can record both feet at the same time, with different shoes. For example, they explained how on one foot might be a male’s loafer where on the shoe the same guy might be wearing ladies heal. This to me was insane to considering someone walking on the spot doing different tempos depending on the person they were recording for, and being able to do this not just focusing on one shoe at a time, but TWO…this idea was crazy and amazing at the same time. When the guys were explaining the Foley room, it made me think how cool it would be just to watch a Foley artist working. One of the guys of the tour talked about how Foley artists come up with interesting ways to produce different sound effects that are not always the natural sound, but sound exactly the same. I think this room would be really cool to watch in action and see how the Foley artist comes up with ideas and deals with problems that arise.
Finally, one thing I learned from going to Deluxe studio is how much work really goes into producing a film and we were only witnessing the audio portion of a film. I really never put much thought into how many steps were involved in the production of a movie. This to me was a huge eye opener to be able witness this and get a first hand perspective on the behind of the scene of the production of a movie. Overall, I really liked this field trip and I found it very valuable to have attended. We got a first hand experience of the behind the scenes work and I got to see how much work is put in to a video. During the board meeting the guys described how being prepared ahead of time can make this process a lot smoother and easier. They discussed how they are currently working on a project where the person wants to add in a logo at the beginning of the film. I did not understand at first why that would be such a big deal, but after he discussed it and showed us everything involved in this process; I started to realize how important it is to know exactly everything you need and want done during production and not to cut and costs.
A Year in the Life of the World - Duke and Battersby
I know we didn’t technically watch the video A Year in the Life of the World, but while looking at Cooper Battersby and Emily Vey Duke’s website we briefly watched this project as a work in progress video proposal. I found this video to be very exciting since I have always been very interested in time-lapse photography. Last year in film, my group was doing a documentary on a McMaster run event and during one of the interview’s with a participant we decided to use time-lapse photography. We used this footage of just people passing outside the student center to show the amount of traffic as B-roll footage during the interview.
This idea of time-lapse photography is very inspiring to me, and when I saw this proposal I thought it was a really cool project. Not only did I think this was a cool movie idea, but I also really liked this type of proposal. It was very clear as to what they were going to do, and having visuals as examples of how the installations would appear made the whole idea come together nicely and clear. This gives the audience a better understanding of what Battersby and Duke are trying to propose, whereas a written proposal does not always get the same results. You may think you are clearly explaining you idea within your written proposal, but it doesn’t always come across to the audience as clear. Having a visual proposal allows the viewer to see exactly what you are trying to propose.
Within this particular video, Battersby and Duke are collecting 200 time-lapses from all around the world using different webcams. The time-lapses are showing the changes to the landscapes over the span of a year. The interesting thing about time-lapses is the amount of change that can be visually shown over a span of a couple hours and shrunken into only a matter of seconds. The viewer is forced to see things that you may have no picked up on in real time. One example is daytime shifting to night-time. Normally if the viewer were to be watching a clip, they would notice the day shifting to night-time. However, with time-lapses, the viewer notices this transformation of time automatically as if this was being highlighted for the viewer to notice.
I also found their technique of how they are going to present the final version to be innovated. They are going to have all the 200 videos being projected onto a dome, representing the earth. In order to show a new map of the earth but instead the time-lapses will be projected onto the part of the earth they are from. This idea is very inventive and different, but very cool at the same time. This video has made me think of expanding my traditional ways of thinking and in the future I hope to be able to be this creative when presenting different multimedia projects of my own.
Title: “Lite Down” The title worked perfectly with the final version of the count down. The final title sequences worked out perfectly. I continued the theme of creating the numbers by pin by pin. I had taken the photos using two different settings: Fireworks and Night Settings. All my number sequences were used by only using the photos from the firework settings, but for the Lite Down title sequences I flipped back and forth between the firework and the night setting to give it the flashing light look. I not figure this out until the editing process; it was good that I ended up taking both set of photographs to help in postproduction.
Overview/ Synopsis: When we were first assigned this countdown project, I did not think of how long it would take me from using a Lite Brite. In the end the project took me 10 hours of creating the numbers and taking the photographs and then roughly 3 hours fine editing it all together. Although this project took me a lot of time and effort, it was worth the end result and all the different things I learned along the way. This was roughly the first time I had used my camera that I had gotten for Christmas, so this gave me an outlet to learn my digital camera better and play with all the different feature to get the look I wanted. I found out that it was very hard to take photographs of the Lite Brite since there was so much light involved. This was a great learning experience project for me.
Formal Approach: The formal approach gave me the most problems. It was very hard to keep the Lite Brite in the exact same position frame after frame. I tried my best to keep everything exactly the same from taping the tripod to the ground to ensure that there was no movement. I also taped the Lite Brite to the table I was using in hopes of that keeping it in place throughout the whole process. Even with all these precautions used to keep the frames exactly the same, I still failed. Every time I went to put the pieces in the Lite Brite I had to push hard to get the pegs in, and the Lite Brite would shift slowly throughout the process. I originally thought using stop motion would be a pretty easily thing to do…it only made me appreciate the art of stop motion that much more. It was very time consuming, but I really liked the overall effect it had on the video when it was done. It was really cool to see the numbers being formed in front of my eyes. It was a love hate relationship with Stop Motion.
Audience/ Context: After completely this project and the variety of responses I have received from different age groups viewing my project it really doesn’t have a specific age group per say. Because most of the adults I showed thought I still shot this with a video camera, and this was still a very common mistake by the children I saw it as well. One child I showed it too was very excited to know how I completed this project and was interested to hear every single detailed involved in creating this masterpiece.
Within this journal post, I will be looking at the two assigned readings on lighting: The First Aesthetic Field: Light, and Structuring the First Aesthetic Field: Lighting and comparing and contrasting to the guest speaker’s workshop on light. First off I found the workshop more valuable than the assigned readings. I am a visual and hands on learner, so this exercise was a lot more valuable because I was allowed to actually use the equipment and try and reproduce the lighting in the books. It made me realize how much I would hate for my job to purely be working with lights on different sets, it is such a time consuming job in order to get it to look perfect.
Lighting is defined as “the deliberate manipulation of light and shadows for a specific communication purpose” (19). I found this sentence to be particularly interesting because it’s true that lighting can communicate a lot of information just as much as say mise-en scène of a film can. If the lighting is bright, then the viewer automatically perceived the scene as happy and nothing bad is about to happen, where was if the scene is darkly light then the viewer thinks it’s very dark and sinister and something bad might happen. Lighting can make a viewer perceive the scene differently just by how the lighting is. The way a certain character is lit can also help to typecast a character as evil or as a brooding. “Lighting helps us, or makes us, see and feel in a specific way” (20). Lighting can be used for multiple functions, where as when you sit and watch the video you do not understand the amount of work put in, to light these different scenes to create these different feelings and shape the way we see things.
When we finally had the opportunity to reproduce the image we picked in the art books provided to us, I thought it would be fairly easy to reproduce the lighting. I did not know that there are so many different light sources that can be used to mimic the effect in image. The guest speaker provided us with a Chinese lantern that I would have never guest would have produced such style of light, we were also provided with sheets to cover the light reflecting off the walls creating to much light. And lastly we also learnt that you can bounce light off form core to help produce the different effects you want.
The certain picture we were trying to recreate had “fast falloff” which the reading defines as “the brightness contrast between the light and shadow sides of an object” (25). Our subject that was being lit had shadow on only one side of their face while the other side was still light enough to reveal a certain contrast between the two and the subject looked “ominous” while sitting in darkness. We had to diffuse the light by using a black cloth to stop the reflection that hit the ceiling from affecting the overall shot. We also had another light that was directional to help give the subject the shadow on one side of the face while having the other side dimly still lit. Below is an example of how the fast falloff can be created and an example of what fast falloff looks like.
Example:
Overall, I found this exercise very valuable because it allowed me to actually try and recreate the lighting as a group. I found this was very helpful, since I learn better when I do something rather than having it lectured on.
We were given rough footage from the television show Blue Murder which is a police drama. Our task was to take the footage which is over fifteen minutes of footage and edit it down to a one minute clip. My group decided to present the one minute clip as “previously on Blue Murder…”. We decided it would be best to keep the context of the television the show and use this one minute clip to update the audience of what happened previously on the show in order to refresh the audience memory of last week’s episode before watching the brand new episode. All the clips we chose were high intensity showing the most crucial parts of the show. We were not allowed to use synched audio from the show, so my group wrote voice narrative script, and then recorded it to fill in the gaps of where we were missing information. We decided to get rid of the visual time code at the bottom of the screen to make the scene seem more real.
One thing we had to fix in the video was Constable Chazz was shooting in one direction and the bad guys were shooting in a different direction than the police officer. We did not want to cross the 180 rule because it did not make sense. We decided that we would flip the scene where the cop was shooting in order to keep continuity between the scenes. In Final Cut we “flopped” the whole images it made more sense since the shooters and the cop now looked like they were shooting at each other. One last thing we had to consider since we flopped the scene was that the licence plate on the van was now backwards. We decided to fix this and blur out the licence plate, just like they do in some cop television shows or on the news.
Our one minute clip had to include two or more criteria given to us. Our group chose to express/ tells a story and hints of an autobiography. The one minute clip focuses on a day in the life of Constable Chazz as a police officer. We see him walking around downtown Toronto, when he hears gun firing and he runs to the scene of the crime. The video tells a story of Chazz as a police officer saving people’s lives and preventing/ stopping crime. The clip also hints at an autobiography since it shows him doing his daily tasks at work and how he responds in this high intensity situation. A person's job can show you a lot about a person’s character and this helps to show Constable Chazz in an autobiographical state.
Finally, we were told to address one item from Robert Bresson’s notes on sound. Our group decided to address was “image and sound must not support each other, but must work each in turn through a sort of relay”. This one seemed the more reasonable to consider since we were not allowed to use synched audio. This made us really consider and have to find appropriate sound and to link it with what images. Or in some cases, the visual images were more important and could stand alone without having some kind of soundtrack added to better a scene or to emphasis it. The video and sound were not used to support each other but worked together in order to make the best piece of work.
This week in class we were shown a film called Tran Scan, which was a video that was composed of all still-frame time lapse pictures taken in the perspective of the traveler. This film composed completely of pictures created a very real representation as if you were the one driving across the country in a car. I often get motion sickness from driving in the car, and this actually simulated that for me as well. As soon as the film started I knew my head was not going to be able handle the ups and downs that the camera simulated while driving. I had to look away every so often so I wouldn’t get sick, but I still walked away after with my head having a headache.
This video meant a lot of me because when I first learned about stop motion, I have always wanted to create a stop motion piece of my own. My goal is to one day actually maybe create one, or maybe I will make a stop motion project for an assignment this semester. This whole idea of using still frame images to create a movie just seemed very interesting to me, leaving me with wanting to create a work of my own. This has been a very inspirational piece for me, and I will use it as inspiration throughout this semester, perhaps this will give me an idea somewhere down the road in my future. As soon as I saw this film, I just wanted to know how he did it. So below I have posted how he constructed Tran Scan.
How the film was created: Shot with a Minolta Dimage 7i at 2560 x 1920 pixels. Each shot covers about 10 kilometers (6 miles). Time-lapse speed is about 5,700 km/h (3,550 mph). Interval between snapshots is about 5 seconds. Playback rate is 10 snapshots per second. There are 5,000 snapshots. Driving distance was 7,200 km (4,480 miles). The drive took 14 days (no retakes). Total creation time was 4,450 person-hours.
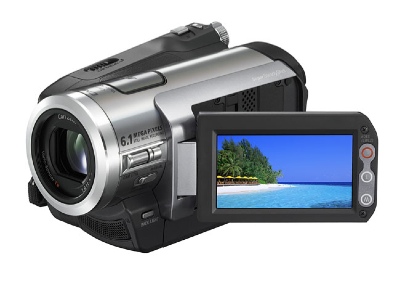
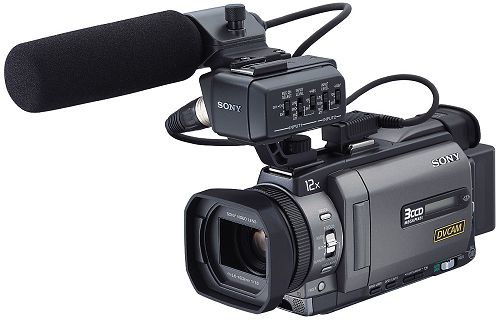
This week in class we were split into groups and each group was given a video camera. One group was using Sony DSR-PDX10 video camera, another group Sony PD170, and lastly my group was using a Sony HD HDR HC7 camera. These were different video cameras then what we were used to using last year. We were taught all the basic functions of the camera, how to turn it on, where the battery went, how to charge the batteries, how to zoom, how to set the camera to manual settings etc. I was really jealous when I saw some of the other groups using the Sony PDX10’s because this camera looked very professional to me and I really wanted to learn how to use it, but it made realize that it is there to use on future assignments.
Sony HD HDR HC7
Sony DSR-PDX10
After we were done learning how to use our cameras we were given a function and we were sent out to take footage using our assigned function. My group was assigned to use digital effects while filming. This puzzled my group a lot at first because we thought that digital effects were only done during the editing phases. We got out the manual and looked up digital effects and surely enough we found that there were a bunch of different functions we could use. One digital effect we used was “old movie”; while we shot video the camera added the effect as if we were filming using an old video camera. Other effects that we fooled around with were sepia, still images, trail, mosaic and other cool effects. This experiment was interesting because it forced us to learn something new on the cameras and we also gave us a refresher on how to use the cameras. I really like hands on tasks, so this in class assignment was great for me because being able to hold the cameras helped me learn it a lot better than if the professor has just given a lecture on it.